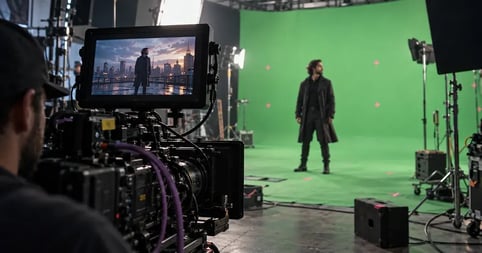
Chroma key is the technique of removing one specific color from a shot so a different image can sit behind the subject. A green screen is just one surface you can point that technique at. The screen is the prop. The key is the work.
Almost everything written about chroma key online is published by a company that sells you the software, the screen, or the lights. That is not a conspiracy, it is just who bothers to write about it. It does mean the honest parts get left out.
This guide covers what the key is cut on, why green became the default and when blue still beats it, the four ways a key goes wrong on set, and the shots where you should not reach for a screen at all.
The screen is sorted. The soundtrack is not.
You have made the technical calls. Now pick the track that sells the place you are building.

What is chroma key?
Chroma key is a compositing technique that makes one color in a frame transparent so another image can show through it. You shoot a subject against a solid, evenly lit background. In post, the software isolates that color range and turns those pixels into a hole. A second image slides in behind. The result reads as a single shot.
The name comes from the mechanism. Chroma means color. The key is the signal that decides what stays and what goes. Put them together and you have a key cut on color, which is what separates this from every other way of isolating a subject.
Chroma key vs. green screen: what is the difference?
Chroma key is the technique. A green screen is one of the surfaces you can apply it to. People use the two words interchangeably and mostly get away with it, but the distinction matters the moment your shot stops being standard. You can chroma key a blue screen, a magenta screen, or a wall painted whatever color your subject is definitely not wearing. OBS Studio ships with green, blue and magenta presets plus a custom color picker, which tells you how flexible the underlying technique is.
Once you hold the distinction, a lot of confusing advice sorts itself out. "Green screen problems" are usually chroma key problems, and they follow you to a blue screen. If you want the physical side of it, our guide to how to use a green screen covers buying, hanging and lighting the thing.
Other names you will see for the same thing
Chroma keying, green-screen keying and blue-screen keying all describe the same operation. Apple's glossary lists all three as names for it. In practice you will also hear "green screen" used as a verb, as in green screen the shot, which is where most of the confusion between the technique and the backdrop comes from.
How chroma key works
Chroma key works in three moves: the software identifies a range of hues, builds a transparency map from that range, then layers a new image behind the transparent area. Everything that makes a key good or bad happens inside those three moves. Understanding them is the difference between fiddling with sliders and knowing which slider to reach for.
The key: hue, not brightness
This is the part most explanations skip. Broadcast switcher documentation states it precisely: a chroma key cuts its hole based on a color value, or hue, rather than on a luminance value or an alpha signal. Brightness is not what the software is matching on. That is why a green jacket vanishes whether it is in shadow or blazing under a key light, and why turning the exposure down on a badly lit screen does not rescue the key.
Every keyer gives you a tolerance control for this. In Kdenlive it is called Variance, and the documentation defines it plainly: the smaller the value, the closer a pixel's color has to be to the key color to be made transparent. In OBS the same idea is called Similarity, and it ships set to 400 on a scale that runs to 1000, with Smoothness at 80 and Key Color Spill Reduction at 100. Different names, same job.
The matte
The tolerance decision produces a matte: a black and white map where white is keep and black is drop. Apple describes chroma key as deriving an alpha channel or matte from an evenly lit green or blue background, which is exactly right. Pull the tolerance too tight and you get holes in the background you meant to remove. Push it too wide and you start eating the subject. Most of the time spent "getting a key" is spent negotiating that trade.
The composite
Then the matte gets applied and a background image goes behind it. That layering step is compositing, and chroma key is one technique inside it. Nearly every video editing software package includes a keyer, from free tools up to the plugins used on features.
Why green, and when blue is the better call
Green is the working default for two practical reasons crews cite constantly: it sits far from human skin tones, and almost nobody turns up to a shoot wearing it. Blue is long established and still the better call on specific shots. Neither color is correct in the abstract. The correct key color is whichever one your subject is definitely not wearing.
What makes green the default
Skin separation is the whole argument. Because no skin tone sits near chroma green, the keyer can take a wide tolerance without starting to eat faces and hands. Wardrobe helps too. Green is uncommon in everyday clothing, so the odds of a shirt vanishing mid-take are lower than with blue, which shows up in jeans, suits and uniforms constantly.
When to shoot on blue instead
Shoot blue when green is already in the shot. Foliage, a product with a green label, a sports kit, a subject who will not change that jacket. Blue screens have been in use for decades and plenty of studio infrastructure is still built around them, so on a rented stage the choice may be made for you. If your talent is wearing blue, you are back to green. If they are wearing both, you have a wardrobe conversation, not a keying problem.
Colors to keep off the talent
Whatever the screen is, keep it off the subject. That includes things people forget: reflective jewelry that picks up the screen, glasses that catch it, and semi-transparent fabric that lets it through. Shiny surfaces are the quiet killer here. They do not just look green, they carry the screen's color into the matte.
What chroma key is used for
Chroma key shows up anywhere a subject needs to be somewhere the camera is not. Weather broadcasts are the obvious one, with a presenter standing in front of a flat wall while the map is keyed in behind. Beyond that, the same technique does a lot of unglamorous work.
- Virtual sets for news, corporate and interview formats
- Streaming overlays, where a creator sits on top of gameplay instead of in a floating box
- Product shots that need a consistent background across dozens of items
- Removing rigging, safety wires and harnesses by covering them in the key color
- Placing actors in locations that are expensive, dangerous or imaginary
It is one of the cheapest ways to raise the apparent production value of a shoot, which is also why it is one of the most commonly used visual effects techniques going.
Where chroma key falls down
Chroma key fails in four predictable places: color spill onto the subject, fine detail the matte cannot resolve, lighting that is not as even as it looked on set, and audio that nobody planned for. Three of those are picture problems every vendor guide mentions in passing. The fourth gets ignored almost entirely, and it is the one that most often makes a finished piece feel cheap.
Spill
A lit green screen is a big green light. It bounces onto the back of your subject's shoulders, into blonde hair, along the edge of a jaw. That is spill, and it survives the key: the subject comes through with a green rim that reads as fake immediately. Removing it is a separate operation from pulling the key, which is why editors run it as its own step. Kdenlive, for instance, lists spill suppression as its own set of effects alongside the keyer. Distance is the cheap fix. Move the subject further from the screen and there is less bounce to clean up later, which is a lighting decision, not a color correction one.
Hair, glass, and motion blur
A matte is a binary decision applied to things that are not binary. Flyaway hair is part subject and part background in the same pixel. So is a glass, a smoke effect, a fast hand crossing frame. Keyers handle these with partial transparency, and they handle them badly when the footage is compressed or the screen is uneven. If your shot has hair, glass or fast motion against a key, plan for the edges to take real time.
The lighting bill nobody quotes you
The screen has to be lit evenly and separately from the subject. That is two lighting setups in one room, and the screen one is unforgiving: a shadow, a hot spot or a wrinkle all read as a different color to the keyer, and the tolerance that removes one will not remove the other. A lot of bad keys are not a software problem at all, they are a screen that got lit by whatever was already pointing at it. Budget for the fixtures and, on anything sizable, for someone who does lighting a set for a living.
The audio problem nobody mentions
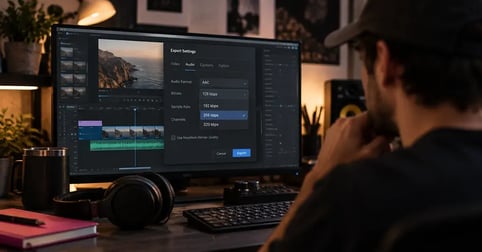
Here is the one you will not read on a software vendor's blog. Green screen stages are acoustically hostile. A hard cyc wall is a large, flat, reflective surface, the space is usually empty of anything absorptive, and your talent is standing well away from the walls with a mic that is hearing the room as much as the voice. Production sound on green screen shoots is routinely worse than the picture from the same shoot, and no amount of keying fixes it.
Two things help. Record room tone before you strike the set so you have something to smooth edits with. And budget the same care for the soundtrack as for the composite, because a viewer will forgive a soft edge long before they forgive a scene that sounds like a warehouse.
When not to key at all
Sometimes the right answer is to skip the screen. Keying is a solved problem for a locked-off presenter against a flat wall. It gets expensive fast when the camera moves, when the subject has complicated edges, or when the background needs to light the foreground convincingly. Three alternatives are worth knowing.
LED volumes and in-camera VFX
The biggest productions have been moving away from green for years. The background plays on an LED wall behind the actors and is captured in camera, correctly lit and correctly reflected, with no key to pull. Epic's documentation is blunt about the intent: the primary goal of in-camera VFX is to remove the need for green screen compositing. The same page notes that when a green screen is still used, restricting it to the camera's field of view means less green spilling onto the actors and set. That is a useful principle even without an LED stage: less screen in frame is less spill to fix.
Rotoscoping and object masks
When there is no screen and no second chance at the shoot, you cut the subject out by hand or by tracking instead. Rotoscoping and object masks are slower than a key and they do not care what color the background is, which is exactly the trade you want on a shot you cannot reshoot.
Software background removal without a screen
Streaming and conferencing tools will drop a background with no screen in the room at all. It is good enough for a call and usually not good enough for finished video. Watch the edges on any of them and you will see the same things: hair that softens and reappears, a wobbling outline on the shoulders, and anything held up near the body flickering in and out. Fine for a meeting. Not fine for a client deliverable.
Now for the layer the keyer cannot fix.
Keying decides what the viewer sees. Music decides whether they believe where they are seeing it.
Frequently asked questions
Chroma key is the technique of removing a color from a shot. A green screen is one of the surfaces that technique can be applied to. The screen is a physical backdrop you buy and light. The key is the process that makes its color transparent so a new image can sit behind the subject.
The four common ones are color spill onto the subject, edges that break down on hair and glass, the cost of lighting the screen evenly and separately from the talent, and poor production sound in the hard, empty rooms these shoots happen in. Spill removal is a separate step from pulling the key.
Yes. A chroma key works on any solid color the subject is not wearing, and keyers commonly offer blue and magenta presets as well as a custom color picker. You can also skip the key entirely and separate the subject by hand with rotoscoping, or let a streaming tool detect the person without a screen.
Use blue when green appears in the shot: foliage, a green product label, a sports kit, or wardrobe nobody is changing. Blue screens have been in use for decades and some studio infrastructure is still built around them, so on a rented stage the choice may already be made for you. The drawback is that blue is far more common in clothing than green.
Whichever color your subject is definitely not wearing. Green is the usual default because no skin tone sits near it and few people wear it on camera, which lets the keyer take a wide tolerance safely. Blue is the better choice when green is present in wardrobe, props or background elements.