Jul 16, 2021
*Updated April 2022
It’s easy to forget just how complex video lighting really is. That is, until you need to think fast to solve lighting issues in real-time during a shoot.
Whether you’re filming a talking head style vlog or something more large-scale like a music video, preparation is key. This is true when shooting in familiar and unfamiliar locations alike, and here’s why.
If you don’t know what to expect ahead of time, you risk bringing along the wrong types of gear and leaving behind the right ones.
You could easily end up with footage that is under- or overexposed with a strange mixed color temperature effect that you’ll spend hours fixing in post-production. (That’s a lot of stress and hassle no one wants to deal with.)
The goal here is to make your video’s lighting look flawless and effortless on-screen, even when it’s anything but.
That way, viewers will be none-the-wiser if you use eight different motivated lights in a single shot, and fellow creators will be on the edge of their seats wanting to know exactly how you did it.
Whether you’re starting a YouTube channel on your own or with a team, this guide will help you introduce motivated light in simple and effective ways without racking up excess production costs.
Master motivated lighting for YouTube videos
Maybe you’ve used motivated lighting in your vlog lighting setup a hundred times before. Or maybe you’re familiar with the term but unsure how to start putting theory into practice.
Whatever the case may be, it’s important to distinguish between motivated and practical lighting before going any further.
Practical lighting
- Practical lighting is essentially any light source that exists with the frame and that viewers can see. This could be natural lighting coming through windows, from a lamp, etc.
Motivated lighting
- Motivated lighting is any out-of-frame light source that you use to enhance or spread the practical light. You could do this by using a light box, a small handheld RGB light, etc.
Later in this post, we’ll share tips and tricks for introducing motivated lighting in windowless areas, small spaces, and big rooms. But for now, let’s take a look at three things you need to do in any location.
1. Get to know your new best friend: lighting overheads.
You know that last-minute changes come with the territory of your profession and that — no matter how good you might be at adapting quickly — pre-production planning is still crucial.
Shot lists, storyboards, and treatments help create more structure so that productions go smoothly. The same can be said for lighting overheads.
For some context, check out this lighting overhead our team made during pre-production for GLASWING’s “Like Water On A Glass Table” music video:

A lighting overhead like this can help you identify
1) where practical light already exists at the location
2) where motivated lighting is needed and
3) what other gear you should bring along (i.e., color gels, flags, diffusion material, etc.).
Whether you’re filming in a small or large space, this document saves you time during production. You'll be able to spruce up your standard three point lighting setup and make use of every light source you have access to.
You’ll also be able to set up your motivated lighting as soon as possible with time to spare for last-minute tweaks.
2. Take your cues from the practical light on location.
One thing that will always be true of motivated lighting is that practical lighting needs to be established first.
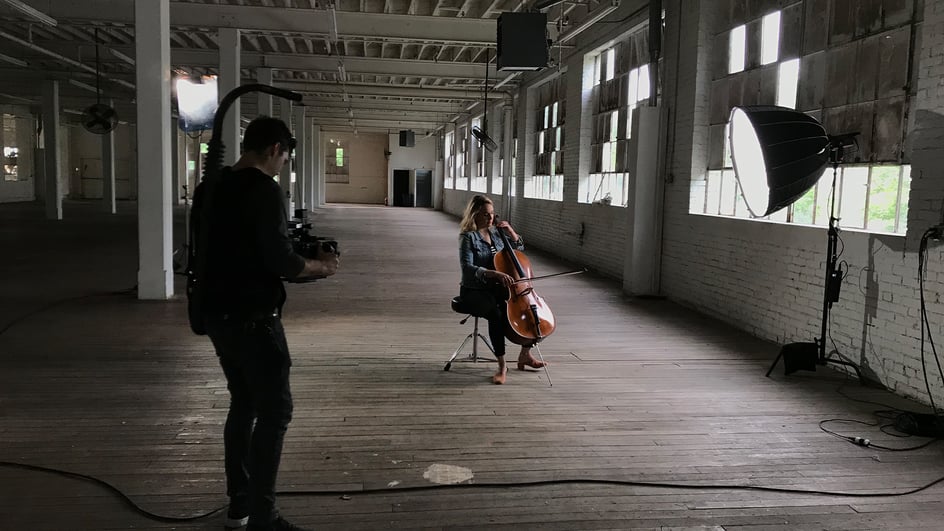
In a very comprehensive YouTube video, Heather from Fellow Filmmaker breaks down her process for using motivated lighting to enhance practical lighting in the scene below:

The lamp is the main practical light in this example, and it’s what nearly every motivated lighting decision was based on.
To get a “Rembrandt lighting” effect on the subject’s face, Heather positioned a motivated key light at a 45 degree angle. But that’s not the only motivated light source in this shot (Hint: there’s 5+ light sources at work here).
Using motivated lighting requires some trial-and-error when it comes to positioning the lights. Introducing low key lighting or high key lighting, for example, could cause the light to spill over into areas you don’t want it to.
That brings us to our third point: Think outside of the (light) box.
3. Think outside of the (light) box.
Sometimes, motivated light sources will be easy to work with and adjust to the desired color temperature and setting. Other times, you’ll need to use color gels or get experimental with materials you already have on hand, like tissues and paper towels for diffusion.
Instead of buying new expensive gear for your lighting setup, look for ways to use what you already have.
In Heather’s case, one of the motivated lights she used was an old half-broken reading light that she taped color gels around. This light source worked as high key lighting that made it look like moonlight was shining down into the room.
And when there was too much spill from other motivated lights, she used foam boards and clamps from the dollar store to shape the light exactly how she wanted.
There’s room to get inventive and test out unconventional lighting and diffusion techniques when working with motivated lighting, so have fun with it.
Location by Location: Motivated Lighting Tips
Some locations prove to be more challenging than others when it comes to motivated lighting.
Now that we’ve covered some lighting basics and examples, here are some actionable tips from our team at Soundstripe for shooting in different types of locations:
Windowless areas
Think garages, attics, basements, and other rooms where tungsten lighting is the only source of light available. A main obstacle for creators working in this type of space is introducing motivated light in a way that’s pleasing and realistic to viewers.
If you’re looking for an affordable way to get more evenly spread light, purchase some cheap work lights from a home improvement store and a piece of cardboard or canvas to bounce the light.
One of our team’s favorite options is to use China Balls since these give off a warm light and can be stored easily after a shoot.
Small spaces
With small spaces, the main issue when using motivated lighting is usually that you have limited room to set up light boxes and other gear.
If you can, position yourself near a window so that you can take advantage of the natural light already present. If sunlight is minimal, try putting a small softbox up in front of the window to give the impression that more natural light is coming in than it really is.
Big rooms
It can feel intimidating to get the perfect lighting in a large space. Depending on how much light is already present, you might focus more on shaping light with negative fill than adding a lot of new motivated light sources.
The location for GLASWING’s music video is a prime example of this.
Because the location had floor-to-ceiling windows throughout the house, our production team opted to use eight-foot black cloths to block out the light coming from the opposite end of the house.
This helped us create more contrast on the actors’ faces and shape the natural light to achieve the right visual effect.
Want more lighting tips and tricks?
If you want to hone your lighting skills and cultivate new ones, check out more cinematic lighting ideas here.
Check out our other resources on how to produce the best YouTube videos: