
Aug 18, 2021
The best lighting scenario for YouTube videos is simple:
No matter where you film content, you have full control over the lighting in a space. You set up everything right the first time — no adjustments, mixed color temperatures, or harsh glares.
You walk away with the best image quality possible and forget all of those times when working with multiple light sources wasn’t this easy.
Unfortunately, this ideal scenario usually gives way to reality sooner than later.
Maybe the natural lighting through a window changes suddenly, and your white balance is completely off. Maybe there’s too much light spill from your key light, and trial-and-error is the only way you can take back your control over the lighting.
You need to make the most out of any space you’re filming in, but in moments like these, that’s easier said than done.
Whether you’re filming YouTube content in a small space, large space, or garage, our Creative team at Soundstripe has a few tips and tricks for getting the best lighting quality during production.
Three-point lighting for Youtube videos
Three-point lighting is a staple for many YouTubers, and with good reason. When used together, the individual components of a key light, fill light, and backlight can make a big difference in overall image quality.
For YouTubers, this type of setup is great for filming sit-down vlogs, talking head videos, and product review videos where the main subject in frame (you) won’t be moving from room-to-room.
But there are a couple factors that can make it difficult for creators to make a three-point lighting setup work: specifically, your budget and filming location.
It might not be a feasible option for you to buy more lighting equipment right now, and even if it is, you could run into issues when setting up the equipment in a small space.
Whatever your circumstances are, we’re sharing advice for creating a three-point lighting effect with the gear you already have in any location.
3 common filming locations (and how to light them)
Small spaces

When you’re preparing to shoot YouTube content in small spaces, your first priority should be to decide where to position the camera.
Now, every small space is different. And the difference lies with how much natural light, practical light, and ambient light already exists in the space.
You, like us, might be able to set up your camera (ideally a camera that's good for YouTube) near a large window and use the natural light as your key light source. (Note: that’s one less piece of lighting gear you need to buy or bring with you.)
Or, if the lighting in the room was poor to begin with, you might position your camera and then get some extra lighting help from a soft box and other available light sources.
Either way, you’re working with less physical space and less room to set up gear.
The sooner you figure out your camera placement, the sooner you can start positioning your lighting equipment exactly where you want it.
Large spaces
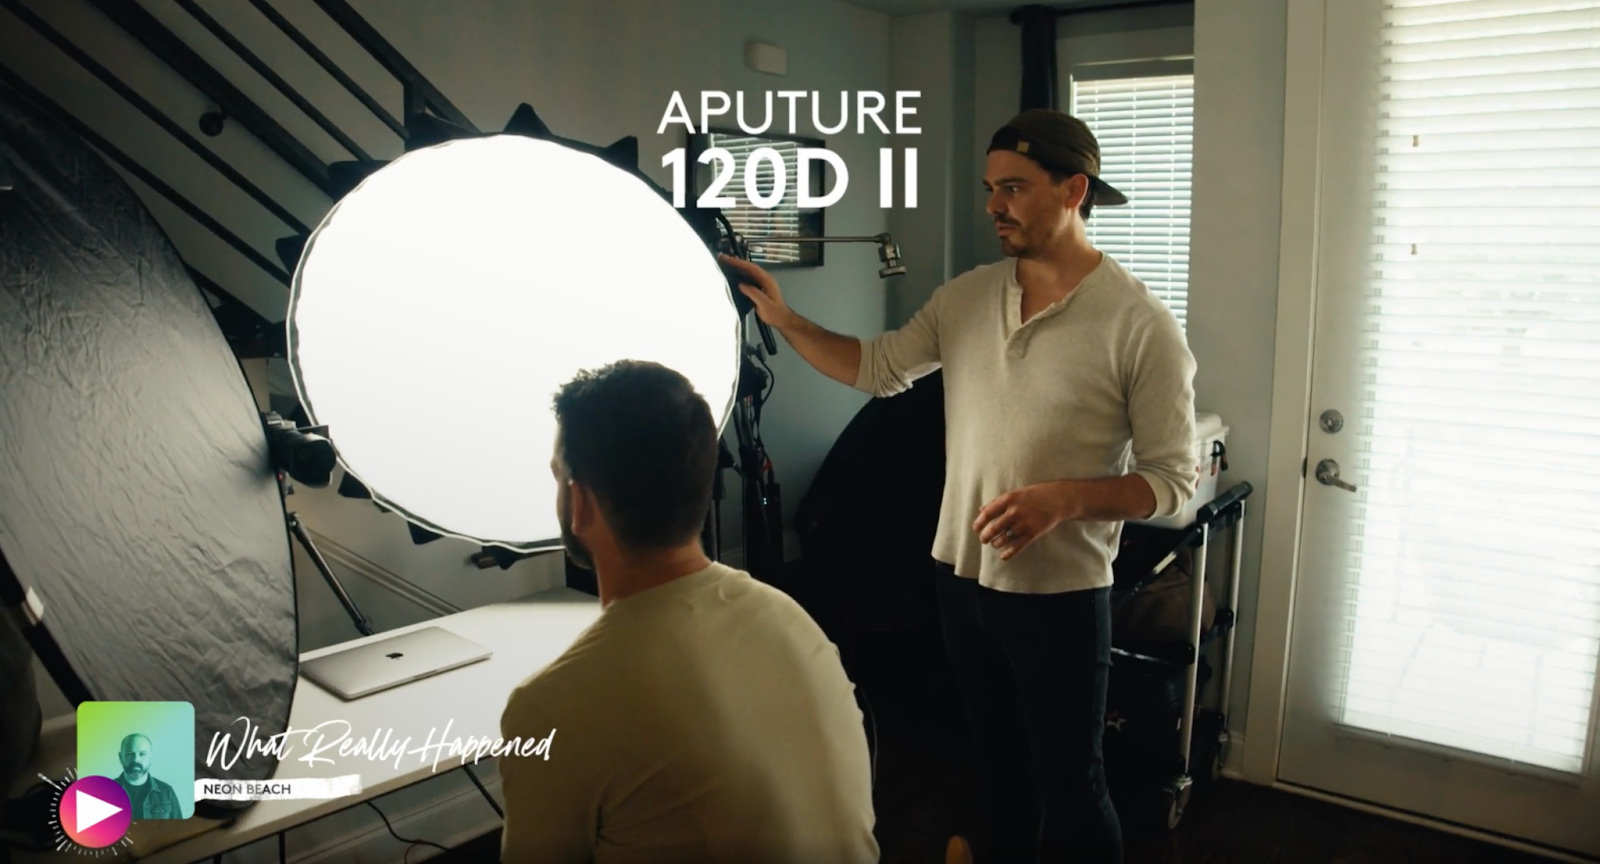
“When you’re in a big living room space...it’s less about adding lights all over the place and more about accentuating the lighting that’s already in existence,” advises Chris Haggerty, our inhouse filmmaker.
While it’s easier logistically to work with a bigger lighting setup in a large space than it is in a small space, this isn’t always necessary.
As you can see from the image above, our team took advantage of all of the natural light coming into the room and then used an Aputure 120D II and a negative fill to create a well-balanced lighting effect on our subject’s face.
For your own setups, look for opportunities to use any existing practical light sources in the space (or introduce new ones). You can then enhance these lights with motivated light sources positioned off-camera.
Garages

Perfecting your lighting setup can be challenging if you’re filming in a garage, attic, basement, or other area where the ambient lighting is usually limited to low-quality overhead lights.
Unlike large spaces, or even small spaces with lots of natural light, getting YouTube-worthy lighting in this type of location requires you to start from the ground up. This means switching off the overhead lights and introducing new light sources to the space.
An affordable and effective way to do this is by using China Balls, like the ones shown above.
With some strategic positioning, a couple of 10- and 20-inch China Balls can function as your key light and backlight — giving off a soft and pleasing light that you wouldn’t be able to get with the overhead strip lights.
How to ensure your footage is quality
In the video above, creator Ben Johnson talks about the importance of starting with a blank canvas when setting up the lighting for your YouTube videos (i.e., turning out all of the lights and introducing new ones gradually).
While it’s helpful to know the lighting best practices for small spaces, large spaces, and garages, you’ll still have to make split second decisions in real-time once you start setting up your equipment.
To get the best quality footage in these different spaces, make small adjustments as you go.
When there’s an unwanted glare, find the source of the problem and diffuse the light.
When the white balance is off because of mixed color temperatures in your space, use color gels or light sources with an adjustable color temperature setting.
The more prepared you are for different types of lighting conditions, the smoother your video production process will go.
Want more video production tips?
Hopefully these tips and tricks give you a good baseline for making the most out of different lighting conditions in different spaces. At the end of the day, vlog lighting setups are bound to change — you just have to be ready to adapt.
If you want more advice on starting a YouTube channel, check out this blog post. And if you’re interested in learning more about lighting for film, YouTube videos, and other projects, our Creative team is here to help you do that.
Head over to Soundstripe’s YouTube channel to watch videos like this one on cinematic lighting ideas for music videos or this one on the best YouTube setups for $50 / $500 / $5,000.