The old saying “Rome wasn’t built in a day” is just as relevant now in the 21st century as it was in the 16th century, especially for YouTubers and other creators. And there’s a simple reason why:
Reaching growth milestones on any platform just doesn’t happen overnight, and that includes starting and growing a YouTube channel.
Great quality videos take time to create, but they also take more time and a fair amount of strategizing to get noticed. (That’s especially true when you’re sharing content on a platform like YouTube that averages 500 uploads every minute.)
To see the type of long-term results you want, you really have to invest wholeheartedly in the content creation and optimization process. This starts at the individual video level and, more specifically, with a YouTube video checklist.
Whether you’ve been creating YouTube videos for years or have yet to get started, this guide is a resource that can help you fine-tune your process for creating, optimizing, and sharing videos on this platform.
The ultimate YouTube video checklist
A YouTube video checklist is exactly what it sounds like: a literal or mental to-do list of everything that needs to get done in the video production process.
There aren’t any hard and fast rules when it comes to making this type of checklist. Some YouTubers get the most out of a checklist that is extremely detailed and structured. Others prefer to keep a mental checklist and tick off the items as they go.
The great thing about content creation for YouTube is that you’re the director, set designer, writer, talent, and marketer all in one. You and only you get to decide what should be prioritized.
So, bearing that in mind, take what you need from the checklist below and leave what you don’t.
1. Decide on the video concept, title, and tags
Odds are you could list at least five video ideas off the top of your head right now. But while it’s great to brainstorm ideas and concepts, the question that you ultimately have to answer is, “Which video concepts will be most interesting to my target audience?”
One way that Heather from the YouTube channel Fellow Filmmaker gages audience interest is by doing some research beforehand:
“I sometimes do an Incognito YouTube search on the video topic I have to see what others are doing, and then sometimes I use the free version of TubeBuddy to help out a bit. I also just think about the title I'd want to click on, while keeping it honest to the actual content of the video — no clickbaiting.”
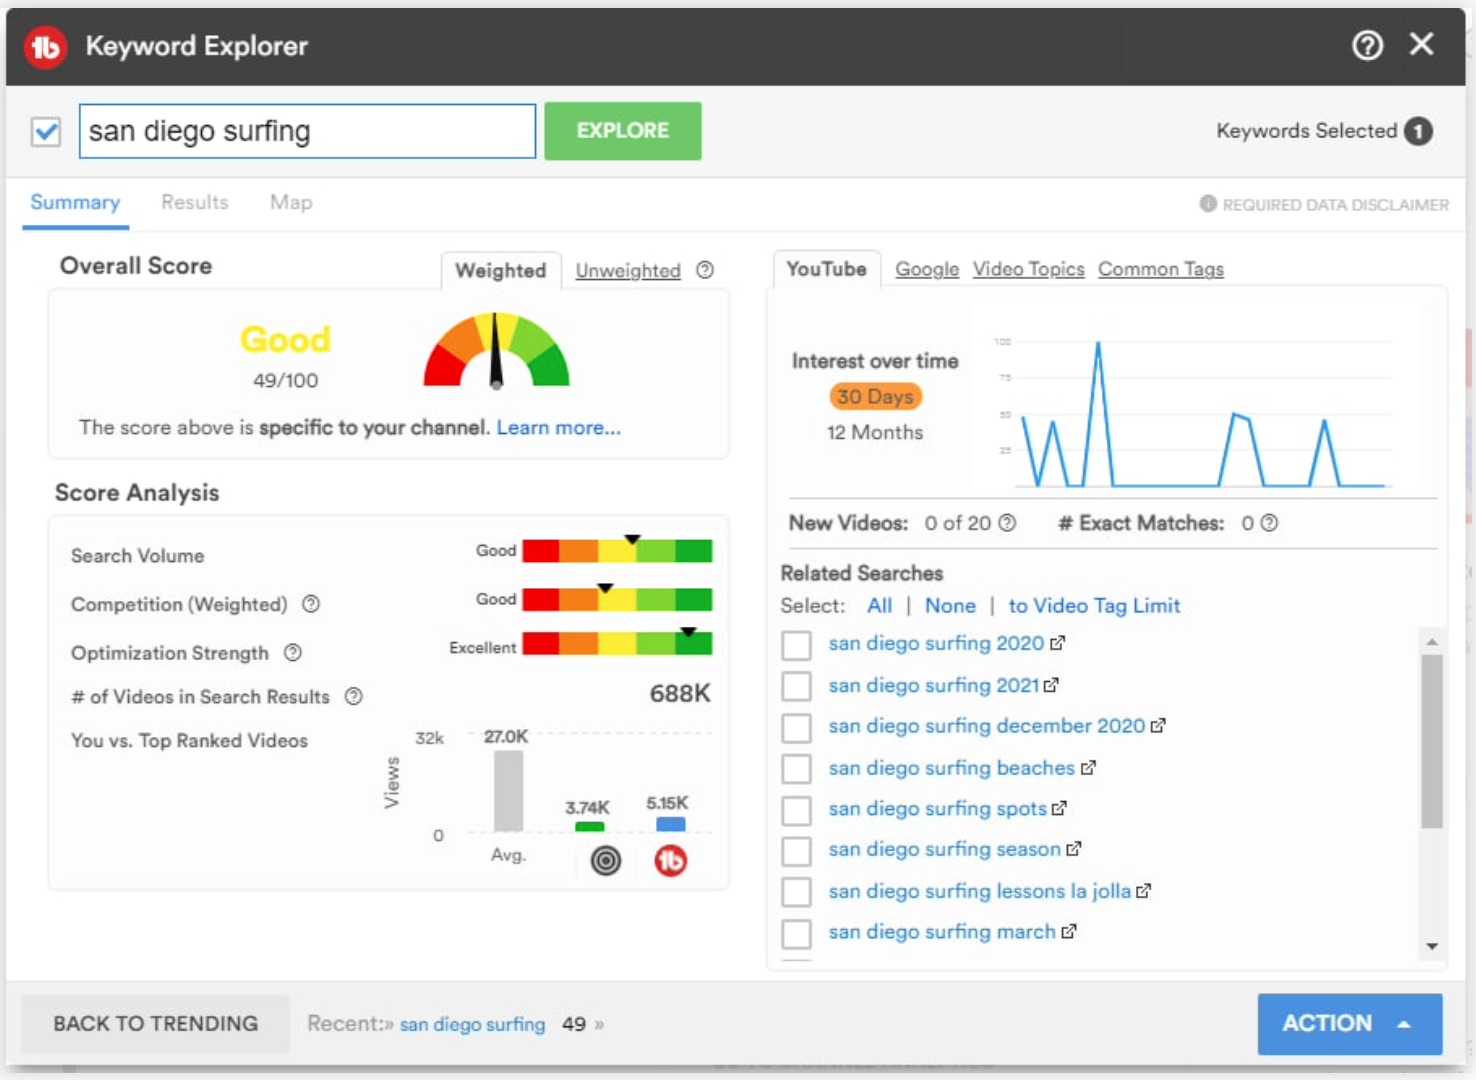
TubeBuddy's keyword explorer feature
Once you decide on a video concept, choosing a title and relevant tags is easy. If you want to simplify the process even more, you can use a YouTube title generator to get a variety of optimized title suggestions.
(And if you want your YouTube intros to hook viewers instantly, check out this blog post.)
2. Sort out the production timeline
Maybe you upload videos to your channel on a weekly or bi-weekly basis. And maybe you have to juggle multiple projects at once to maintain this upload schedule.
Before you can jump right into filming, you need to know how much time you have for planning, filming, and editing each video. For YouTuber Neil Collins, who uploads videos twice a week, it’s helpful to follow a set protocol every week:
“I put together a basic script so I know where I am going with the video, but other than that, the videos are fairly organic … I always create videos on a Sunday and Wednesday eve and upload them overnight so I can post in 4K the next day.”
No matter how often you upload videos to YouTube, what matters is that you’re consistent. If your content is uploaded sporadically, unpredictably, or at times when your audience isn't on YouTube, your subscribers have less incentive to engage with your channel regularly.
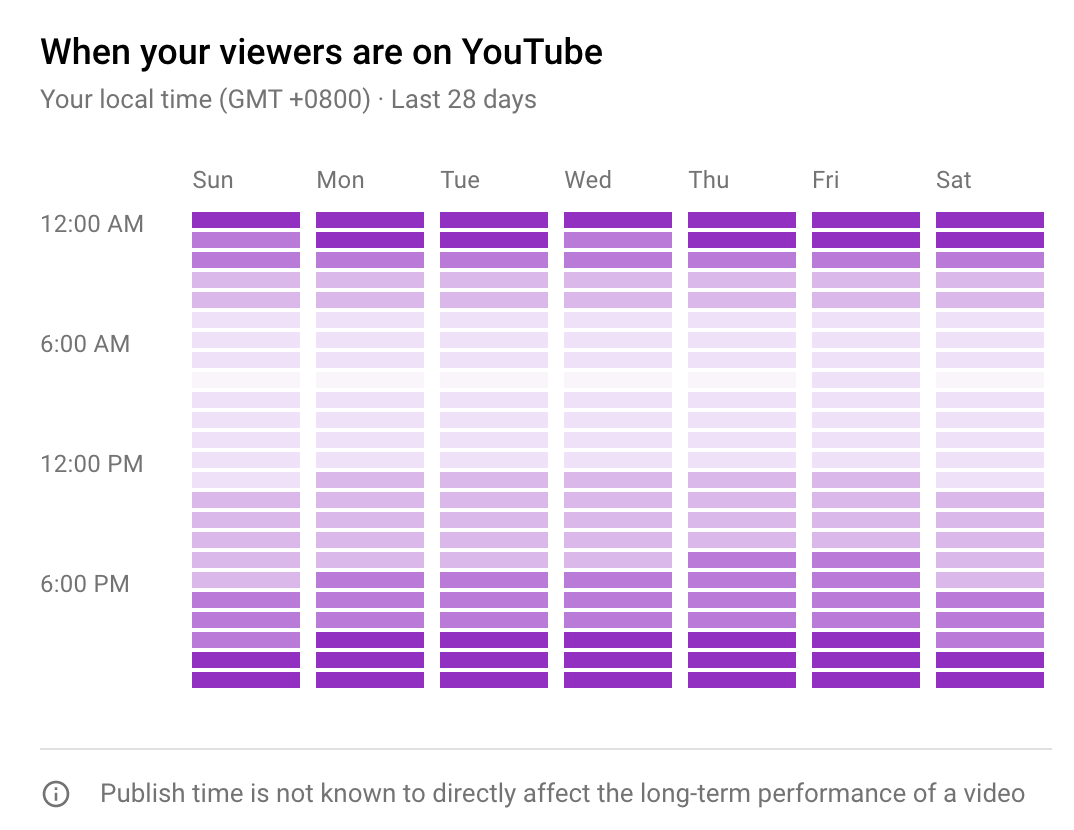
See when your viewers are likely to watch your content
By publishing videos consistently, you build a rapport with your subscribers who trust that you’ll share new content when you say you will. This allows you to focus on creating an engaging viewing experience by adding music and SFX that are safe for commercial use.
3. Add an end screen
After making and editing a video, the strategic next step is to look ahead and consider how you can keep your viewers engaged with your channel’s content for longer.
For many YouTubers (including Heather), an effective way to do this is by adding an end screen to the last 5-20 seconds of each video.
Because end screens can feature up to four elements (i.e., a relevant video, a video playlist, a subscribe button, a downloadable resource, etc.), you have to be fairly selective about which elements you include.
When making end screens for her videos, Heather has found success with a specific approach:
“I like to at least display three videos and a subscribe button. I use a template at the end of my video that I downloaded from simplevideomaking.com, and then when I upload, I have a matching preset template that fits to the one in my video end screen area.”
Someone who watches your video from start to finish might click-through to your other videos even if you didn’t have an end screen. But they might not.
An end screen makes it extremely convenient for viewers to find content that interests them on your channel instead of someone else’s.
4. Share on social media
Once you finish up all of the final details and upload the video to YouTube, the next step on this video checklist is to share the content on social media.
As you work toward growing your platform and reaching more people, keep in mind that the other social media platforms you use are some of your greatest assets.
A promotional post on multiple platforms can instantly give your newest videos — but also your entire channel — more public exposure.
Before you know it, more engagement on social media can lead to more video views and, eventually, more subscribers.
5. Check the post-upload analytics
The purpose of this final checkpoint is to review your video’s performance and then identify specific ways that you can improve your content in the future.
As you start to use analytics for video after video, you’ll notice trends in viewer engagement.
Do most viewers watch your videos until the very end? Are certain videos performing better than others? Which end screen elements are getting the most clicks?
These are the types of questions that you’ll be able to answer by keeping a close eye on your YouTube analytics. And that will help you continue to shape and evolve a YouTube video checklist that lines up with your channel goals and helps streamline your production process.

