Apr 29, 2022
There are certain terms in filmmaking that, when first introduced, might sound like some sacred text or ancient secret of video production. “Three-point lighting” is one of my favorite examples of these because it’s very much as simple and straightforward as the name implies…yet people always seem to get scared by it for some reason.
What are these three points? And how do you actually combine their magical lighting powers for composition? Well, we’re here today to give you a glimpse into the alchemy at work as we break down all the parts of this lighting setup.
Let’s look deeper into this three-point lighting term by going over some basic definitions, exploring some compositional and cinematography theory, and even providing you some outlines and resources to help you master this lighting technique.
What is three-point lighting?
Alright, first and foremost: What is three-point lighting and what does this technique actually mean?
Three-point lighting is a standard lighting technique used in film, television, photography or other artforms for illuminating a subject from three distinct positions of lighting. That’s a basic definition for this popular term. And the three types of lights are comprised of:
- The key light
- The fill light
- The back light
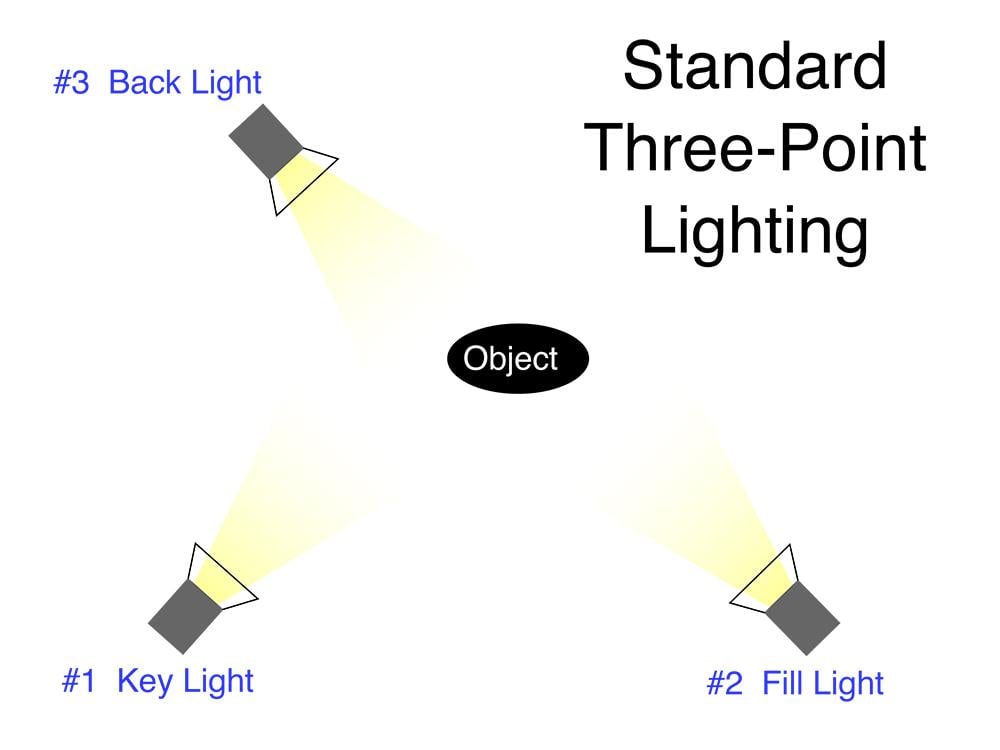
Image via Wikipedia
While they might vary in terms of degree and intensity, the three light sources used in three-point lighting remain consistent where they are placed and what purpose they serve.
Let’s take a look at these different lighting types and further explore how to use them in your own setups.
The key light
The first and most important light in any three-point lighting setup is the key light.
This key light is best thought of as your primary source of light on a subject as it will most often be the brightest and most crucial to your setup. However, you have the freedom to tinker with the many variables for the key light and explore how it changes the look of the shot.
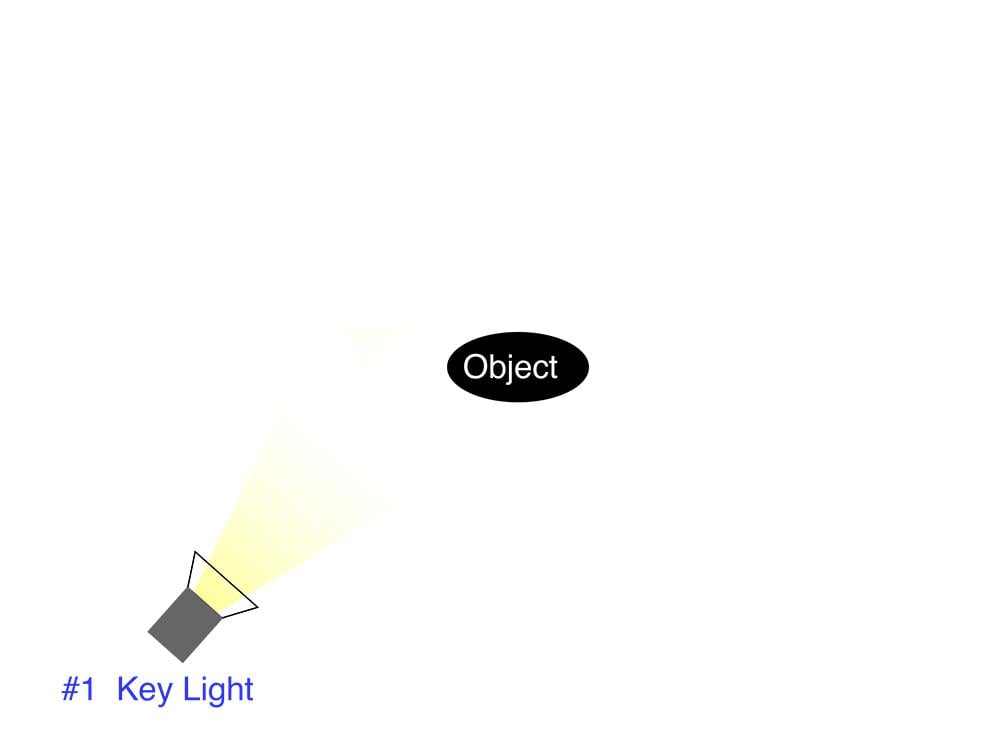
Image via Wikipedia
For most setups, the key light is best set up on a light stand at around a 45-degree angle from your main subject. The goal is to use this key light as the main source for lighting your subject’s face but also make specific use of the shadows it will create across the face. (We’ll get into how to add to or mute those shadows later.)
As far as experimentation goes, the key light is more often than not the brightest and primary source. But it can still be moved around either higher or lower or at different angles.
You can also test different intensities for your key light — from very bright (high-key lighting) to very dark (low-key lighting) — for different thematic effects.
The fill light
The second source of light in a three-point lighting setup is your fill light (sometimes called a secondary light).
The name comes from its relationship with the key light, as the fill light is used to literally “fill” the other side of a subject’s face. This is done by setting up a light source on the other side of your subject (almost mirroring the key light) but usually at a lower intensity.
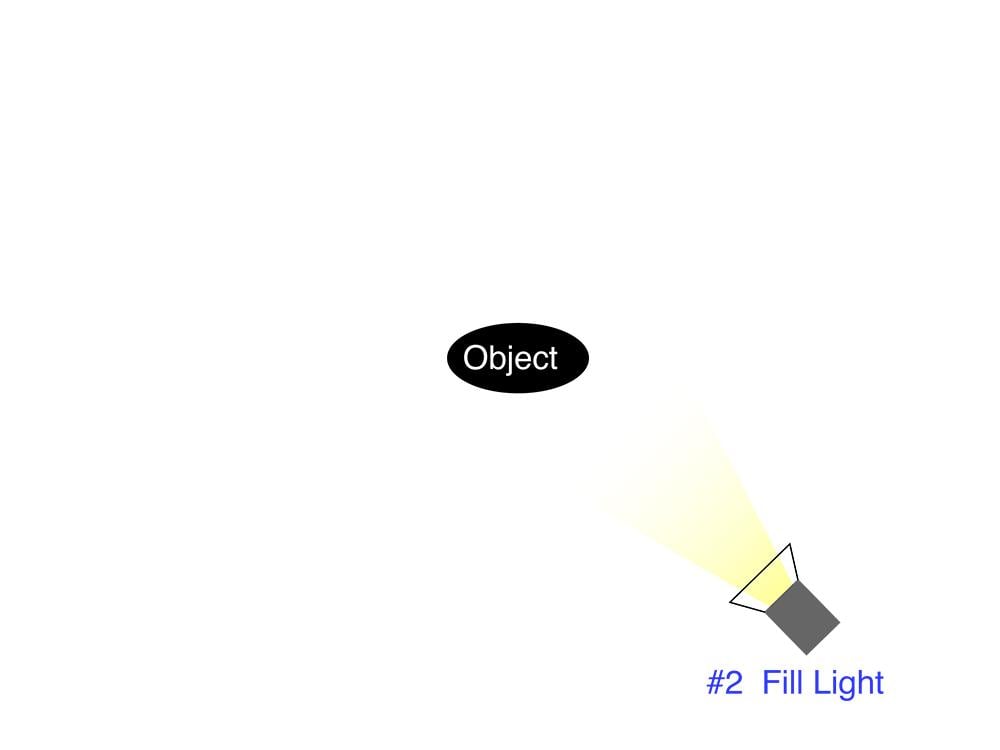
Image via Wikipedia
The goal of the fill light is to find the right balance with the key. While you can experiment with it, the fill light is going to be usually around half as bright as the key light.
This will help to bring the features of your subject more clearly into focus, but with a softer touch. That in turn creates a recognizable fill light “cinematic” look.
The fill light is also open to interpretation however, as you can try out different heights, angles, and intensities. For example, a dimly lit fill light will increase the contrast for a harsher, more challenging look, whereas a brighter fill will remove shadows and make your subject appear more clear and accessible.
The back light
And thirdly, the back light is usually thought of as the last piece in any three-point lighting setup. While there are occasions where a back light might not be used to create a specific effect (or purely for convenience), it is still an important part of the three-point lighting equation.
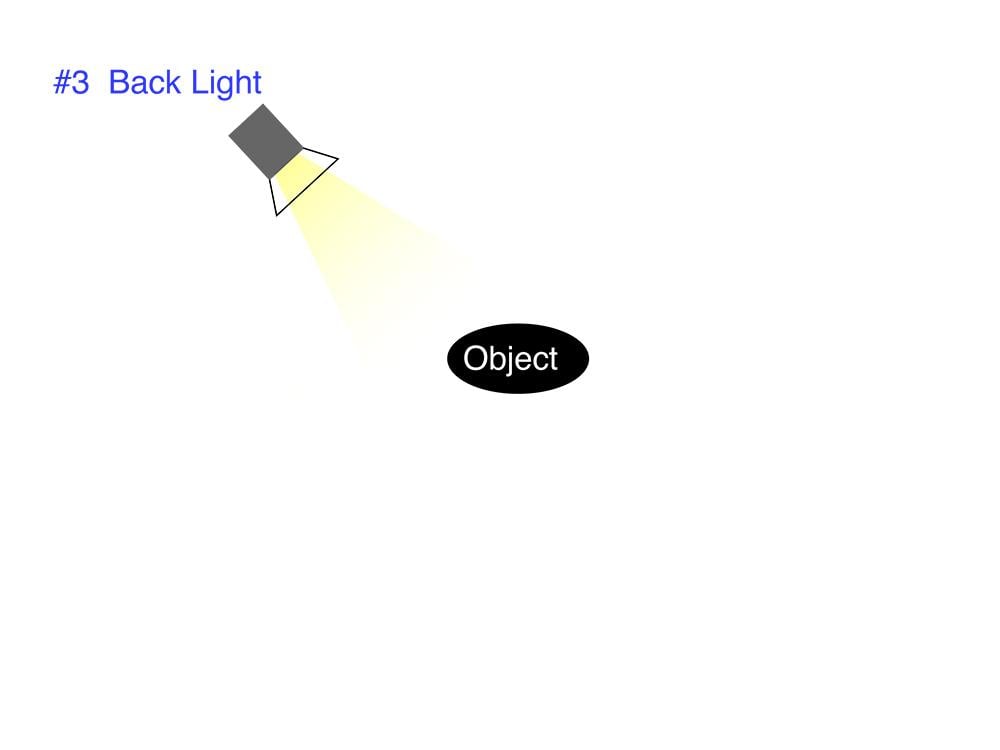
Image via Wikipedia
Also called a hair light, a rim light, or a shoulder light, the back light is usually placed directly behind the subject or slightly to the side (but still behind them). This light’s goal is to help illuminate the subject by creating a “rim” around them which will help to separate the subject from the background in the camera’s eye.
Of course, there is plenty of room for exploration with the back light as well. But in general a filmmaker or DP will keep it simple and use the back light to subtly make the subject “pop” on screen by aiming the light directly at the back of the subject (usually around the neck).
Four-point lighting and the background light
In addition to the three lights outlined above, there is occasionally a need for a fourth light called the background light.
As this obviously adds another light to the equation, this setup is usually called a four-point lighting setup. However, while the original three light sources remain intact, this fourth light is really only used to help illuminate elements in the background.
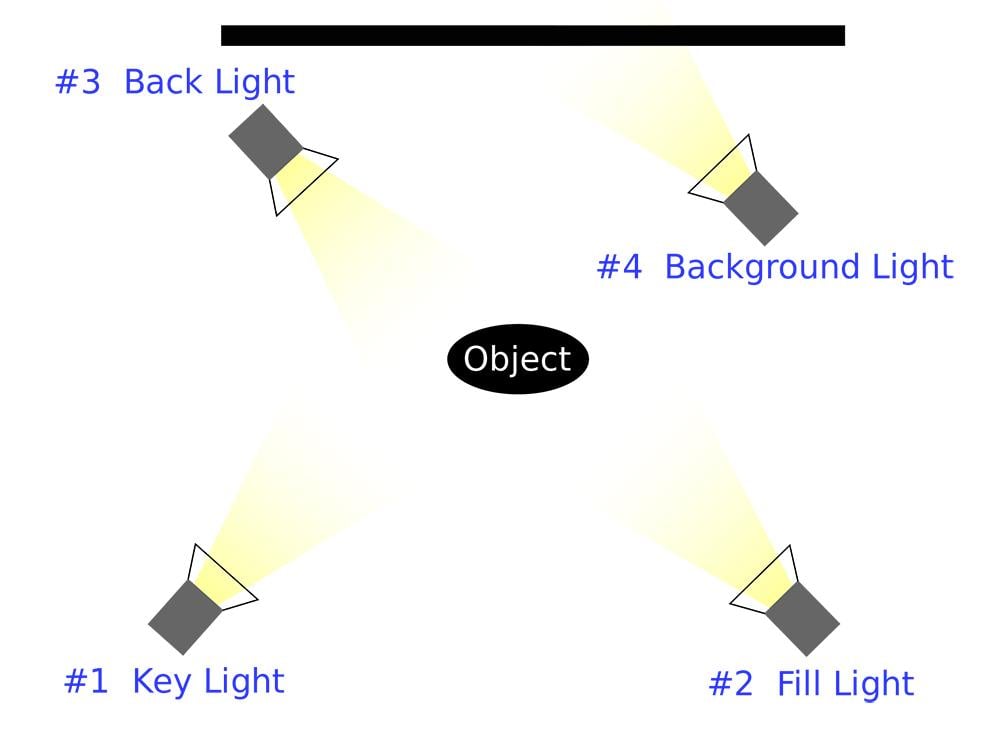
Image via Wikipedia
You’ll see a background light (or background lights) used in different interview or dramatic setups as a way to help make background characters, props, or the general setting appear more clearly. It also helps these elements become a thematic part of the composition.
You can also experiment with background lights because there’s a lot more room to work with. Using a background light is often a good idea simply as a way to add more depth to your compositions, making them more interesting and inviting to a viewer’s eye.
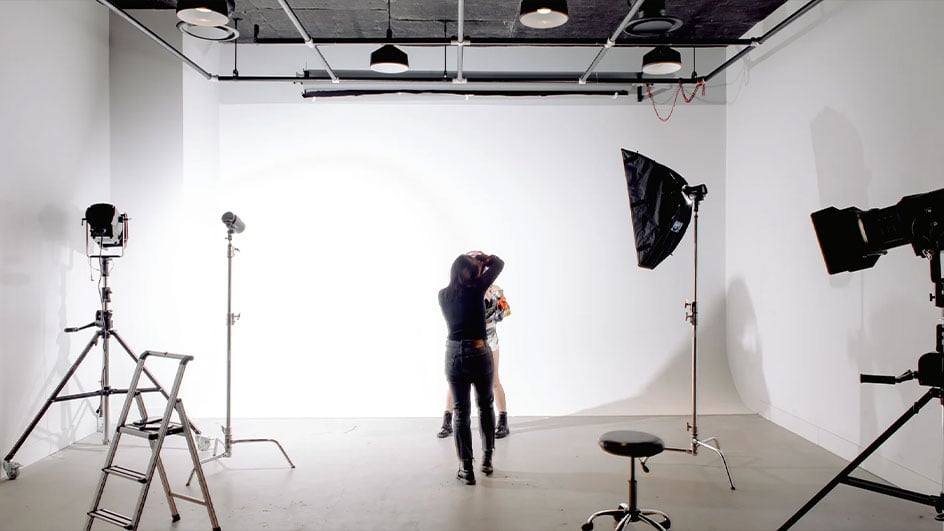
A basic three-point lighting setup
Now with the definitions out of the way, let’s take a look at some outlines and guides for a basic three-point lighting setup.
Keep in mind that these examples are all meant to illustrate how three-point lighting has traditionally been used in film and video. But you’re certainly free to try these lighting types on your own to find your own unique styles and looks.
This tutorial from the YouTube channel FilterGradegives one of the best explanations of what the three lights are and how they are usually set up for basic film or photography purposes:
However, while this might be the best (and simplest) way to think about a three-point lighting setup, there’s more to it than just setting up your lights in these three positions. The real focus should be on “painting” the subject with these three lights.
Here’s a great tutorial that should give you a better idea of how these lights can look when actually being applied to a subject.
From this point, there are tons of great tools and resources out there for helping you learn how to light with three-point lighting. However, while you can always watch more YouTube tutorials, your best bet is to get out there and start experimenting yourself.
Tips and tricks for three-point lighting
To further help you along the way, we’ll also include a few more tips and tricks for harnessing the powers of these lights for your own setups. Keep some of these things in mind as you explore your own looks and techniques.
- Try to remove all other sources of light: For cinematic lighting to work in the first place, you really need to remove all outside sources of light. That includes room lights, appliance lights, and especially daylight from windows or doorways.
- Start with the key light before adding the fill and back light: It’s usually best to start with your key light as you’ll want to fill in the rest of your lights based on the intensity and angle of this first source.
- Consider starting with a three-point lighting kit: While you can mix and match lights you might already own, investing in a three-point lighting kit can be a great way to keep your lights uniform when first learning the ropes.
- Try out gels and diffusers: You can drastically change the mood of style of your lighting setups by simply changing the colors with different gels or diffusers.
- Learn your camera’s range (and limitations): Lighting really should be thought of in regards to your camera. Try to learn and understand your camera’s dynamic range capabilities to make sure you’re getting its best footage while also avoiding blowing out or underexposing your compositions.
Further reading
Hopefully these definitions, outlines, tips, and tricks have given you a solid understanding of what three-point lighting is and how it works. At the end of the day it’s nothing too complicated, but it’s still a technique worth studying as a way to learn the basics of lighting and filmmaking itself.
If you’d like to check out some additional resources to help you in your film and video production journey, check out these great articles from the Soundstripe blog: